The CMG Setup:
At the Center for Manuscript Genetics (CMG) we use the XML database engine eXist-db for research projects on text genetic corpora encoded in TEI-XML. As a base setup for eXist projects we configure two LXD server-containers which run Ubuntu 18.04: one for the development and a second one for a more stable live version of the regarding project data (and application). Such a setup allows us to mess around with the development server without disturbing student assistants, which might be working on improving the data on the live server at the same time.
Although eXist-db provides sufficient documentation on how to install, configure and run eXist and on how to proxy it behind a web server, it took me some trial & error time to merge and adjust these manuals and to get this to run smoothly for our use-cases. Therefore, I decided to document our solution in this blog post. But first things first – what is the problem?
The Problem:
Lets assume we (want to) have a website, which can be reached via the URL: http://www.myproject.be. This website is not done in eXist-db. For the purpose of this tutorial, it is a simple HTML page, but it might be your institute’s home page or a wordpress blog or whatever.
On the same server we also want to publish an eXist-db application, which should be reached via http://www.myproject.be/myfirstapp. And maybe we even want to publish a second app from the same eXist-db instance under http://www.myproject.be/mysecondapp.
What we do not want, is further port-specifications and long eXist-db URL-paths such as: http://www.myproject.be:8080/exist/apps/myfirstapp. What we also do not want is that eXist’s dashboard or any other eXist contents beyond these two apps are accessible to the public. Or in other words: we don’t want our users to find the eXist dashboard just by playing around with the URL.
The Solution:
This setup is best achieved by reverse-proxying eXist-db behind a dedicated web server – in our case Apache. This means, that clients (users from the internet) interact with your apache server, which passes particular requests on to your eXist-db server, which is otherwise only locally accessible. Towards the user, Apache behaves as a proxy (= middleman) for the local eXist server. We call this “reverse proxy” because Apache acts on behalf of another server (hides it from the user), while we call it just a “proxy”, if Apache acts on behalf of the client (hides the user from the servers they want to access).
Apache will direct all HTTP requests and responses which contain “/myfirstapp” or “/mysecondapp” to the regarding app within an eXist-db server. eXist will run as a service under http://localhost:8080/exist – just as it would do on a local laptop or pc.
Any other requests will be directed to the Apache data root folder, usually under /var/www/html…
Here is what we will do:
- Premises
- Downloading and Installing eXist-db
- Running eXist as a Background Service
- Reverse Proxying eXist-db
- Installing an eXist-db Application
- Reverse Proxying an Installed eXist-DB Application
1. Premises: SSH Access and Apache2
First, I assume that you have administrative SSH access to your Ubuntu server and that the domain (here http://www.myproject.be) is registered and set up correctly to route to your server’s IP. These things are usually set up by your server provider – either your institution’s IT or whatever company you registered your server space and your domain with.
Second, I assume that you can control your server via the command line. This means, you can change directories, list their contents, open and edit files with command line editors such as vim or nano (I will use nano). Also, you understand how to run commands as an administrator. If any of this is still a problem for you, check out this tutorial.
Third, I assume that you already have the Apache2 web server running on your server. A web server makes selected contents on your server (folders and files) accessible via the HTTP protocol to clients from the internet. This means that it “serves” these contents to the web, so that people can access them with URLs in their preferred browser. Otherwise, your server can only be accessed via other protocols such as SSH or FTP (given, that those are installed). If you do not have a web server running on your server, follow e.g. this tutorial.
Your Apache data root folder should now be under /var/www/html/. This means, whatever index file (e.g. index.html or index.php) is in this folder: that’s the file that Apache will show when someone enters http://www.myproject.be into a browser. On a new installation, there is an Apache welcome page stored here. You can just delete all contents within /var/www/html/ and create your own index.html there.
Your Apache configuration files are under /etc/apache2/.
2. Downloading and Installing eXist-db
eXist-db was programmed in the programming language Java. Before we can install eXist-db, we must ensure that the server understands Java. To install the so called Java Runtime Environment (JRE), run sudo apt-get install openjdk-8-jre (eXist requires version 8 or higher). If you only want to run software written in Java (like in this tutorial) this will already do the job for you. If you also want to write your own software in Java, you should install the Java Development Toolkit (JDK). To ensure that Java is installed, you may enter java -version. For more details on how to install Java, follow this link.
Now you want to find the download link for the most current eXist-db installer and copy it into your clipboard. Go to the eXist-db website. Click on “Download eXist-db” and select the “Latest Stable Release” icon. You will be directed to Bintray. Scroll down to the “Downloads” section, right click on the eXist-installer link with the .jar extension and copy the link location to your clipboard.
At the time this tutorial was written the latest release was 5.2.0 and the corresponding download link was: https://bintray.com/existdb/releases/download_file?file_path=exist-installer-5.2.0.jar. With the link in your clipboard, go to your server’s ssh terminal and navigate to the home folder: cd /home/[username] [replace the username including the square brackets by your username.]
To download the jar file into this folder, enter:wget -cO - https://bintray.com/existdb/releases/download_file?file_path=
exist-installer-5.2.0.jar > exist-installer.jar
[instead of the link, paste the link to the latest version from your clipboard. The -cO parameter in combination with “> exist-installer.jar” is added to rename the file to look less messy on your home folder.]
You should see on the command line how the download progresses. Once it is done, you might check that the file is there by using ls. You should see exist-installer.jar being listed in the home folder.
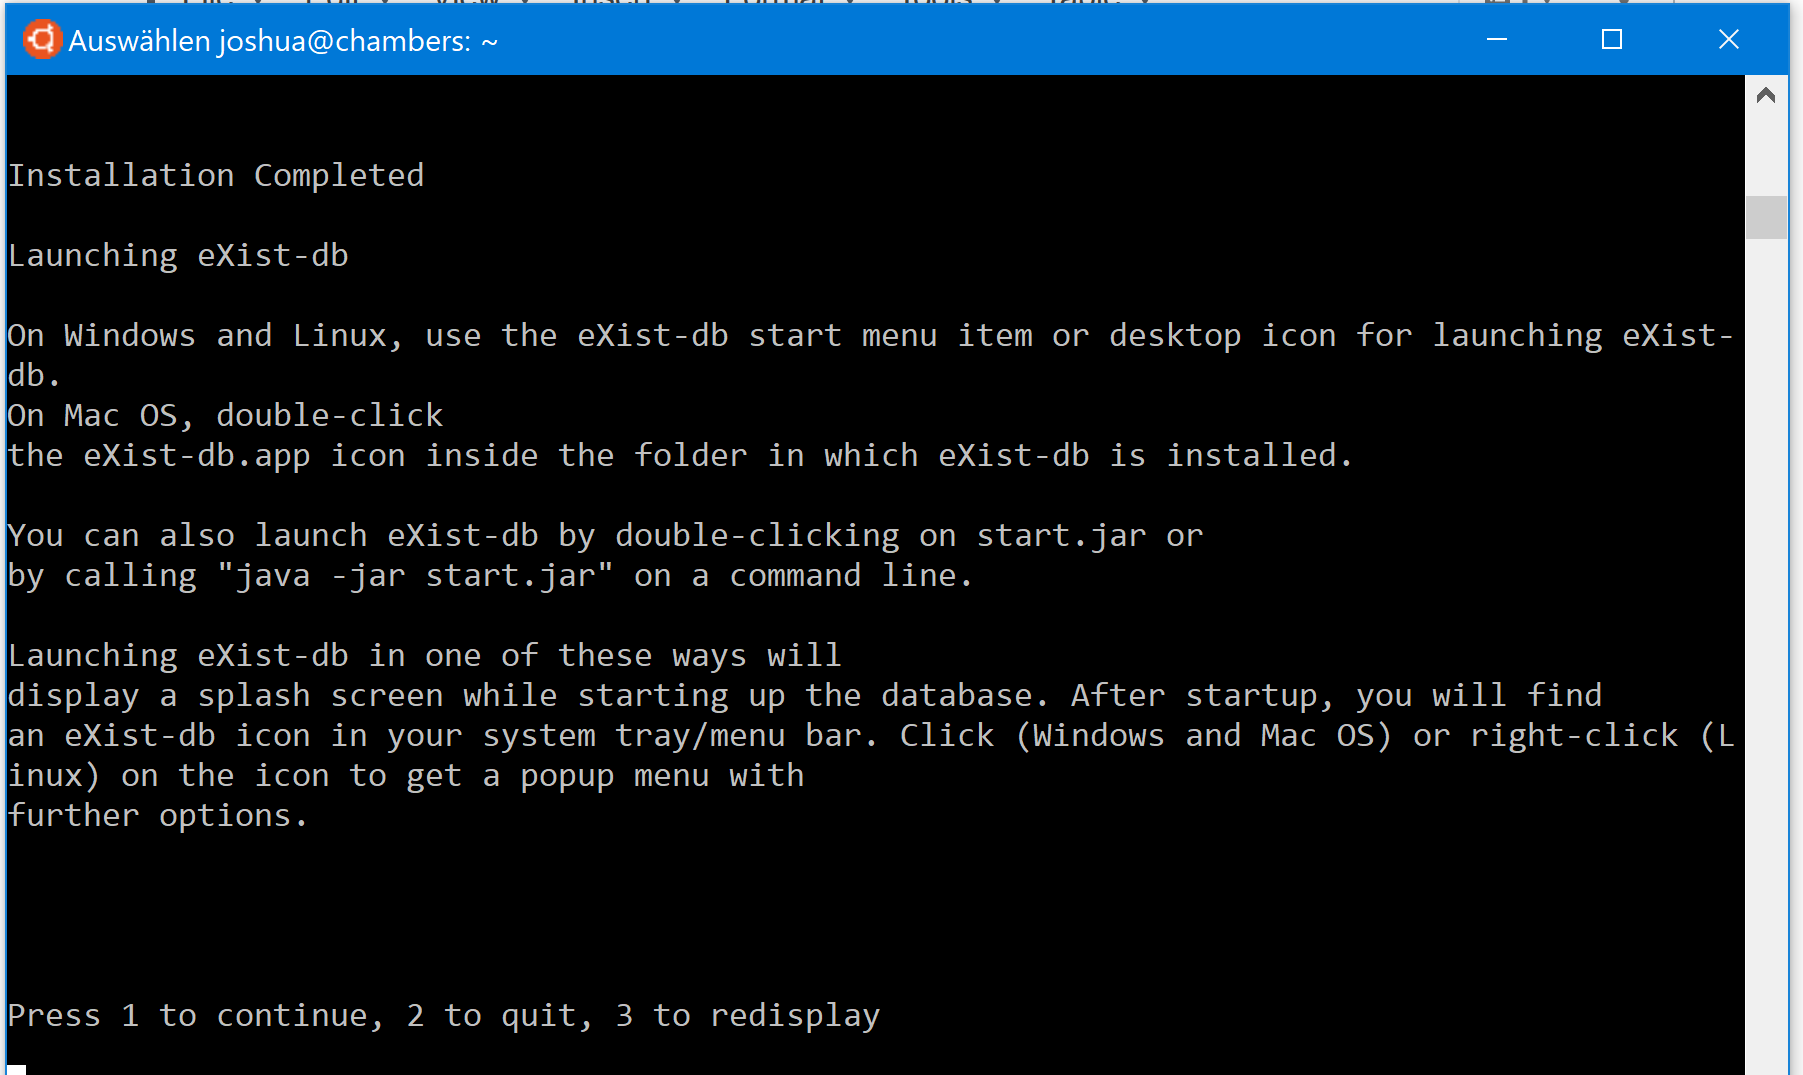
Next we install this jar file. Type java -jar exist-installer.jar. If this does not work, either you did not install Java 8 or higher (see above) or something with your download went wrong. If it works, the headless installer will be executed on the command line.
The following is just a list of what you will be asked by the headless installer. You can basically stick to the default settings (see square brackets). You’ll be asked:
Press 1 to continue, 2 to quit, 3 to redisplay[press 1 and confirm with enter]-
Select the installation path: [/home/[username]/eXist-db][confirm the default setting or enter your preferred installation directory] -
Enter O for OK, C to Cancel:[O and confirm] -
Press 1 to continue, 2 to quit, 3 to redisplay[1 and confirm] -
Data dir: [/home/[username]/eXist-db/data][confirm] Press 1 to continue, 2 to quit, 3 to redisplay[1 and confirm]Set Admin Password. Enter password:[enter a decent password, remember it, and confirm]retype password:[do so]Press 1 to continue, 2 to quit, 3 to redisplay[press 1 and confirm]Select Installation Packages [...] Please select which packs you want to install.[press 0 and confirm]Press 1 to continue, 2 to quit, 3 to redisplay[press 1 and confirm –> the installation might take a while]Create shortcuts in the Start Menu. Enter Y for Yes, N for No:[I would press N and confirm, but feel free to create the shortcuts]Create additional shortcuts on the desktop. Enter Y for Yes, N for No:[Again, I would opt for N, and confirm a last time]
After this, your installation should be complete. You should see something like this:

3. Running eXist-db as a Background Service
As the last message told us, we may now run eXist-db. Yet, we do not want to run it as the current user but rather execute it as a system service by a dedicated user.
First, you will want to add a new system user and usergroup with the name existdb (feel free to use any other name):
sudo adduser --system --shell /sbin/nologin existdb
sudo addgroup --system --shell /sbin/nologin existdb
Then, we must make sure, that this user has the permissions to use (execute, modify) the eXist-db instance we just installed. We achieve this by modifying the permissions on the eXist-db ifolder, as set during installation in step 2. If you kept the default suggestion, the folder should be under /home/[username]/eXist-db/. Therefore, navigate to your user folder…cd /home/[username]/
…and make the new existdb system user and group the owner of the eXist-db subfolder:
sudo chown -R existdb eXist-db
sudo chgrp -R existdb eXist-db
[the -R means recursively, that is: for all subfolders. It is followed by the username/groupname, and last but not least the the folder name for which you want to change permissions]
Next, you want to create a service configuration, so that your servers system manager knows how to start eXist as a background service under the user we just created. Navigate here: cd /etc/systemd/system
Now, using nano (or any other command line editor) with administrator rights, create a file with the name exist-db.service: sudo nano exist-db.service and paste the following text into this file:
[Unit]
Description=eXist-db Server
Documentation=
After=syslog.target
[Service]
Type=simple
User=existdb
Group=existdb
ExecStart=/home/[user]/eXist-db/bin/startup.sh
[Install]
WantedBy=multi-user.target
Remember to adjust the path to the eXist startup.sh script, to direct to your eXist-db folder (definitely change the [user] bit!). To save the file in nano, press Control+o and confirm with Enter.
The last thing you will have to do now, before you can run this service, is change the permission rights for the service file, just like you changed them for the eXist folder earlier.
sudo chown existdb exist-db.service
sudo chgrp existdb exist-db.service
To start and stop eXist-db, you may now use: sudo systemctl start exist-db.service and sudo systemctl stop exist-db.service.
I recommend to enable autostart for the eXist-db service, which means, it will automatically start if your server reboots for whatever reason. To do so, type: sudo systemctl enable exist-db.service
To see all running services, you may run systemctl | grep running. To see all services in autostart, you may run systemctl | grep enabled.
Once the eXist service is started, your eXist-db server will run localls on localhost port 8080. This is of course a bit unhandy, as you can not access it via the internet this way. You would need a local browser on your server, to which you usually only have command line access and then you could locally type http://localhost:8080/exist/apps/dashboard/index.html to reach your dashboard.
So how can you make this local eXist-db service accessible via the internet? By configuring Apache as a reverse proxy server that forwards specific HTTP requests and responses to the local eXist-db server.
4. Reverse Proxying eXist-db
To make your local eXist-db server accessible via the web from behind your Apache web server, you must configure apache accordingly. Navigate to the apache folder: cd /etc/apapche2/and check out its contents using ls. There should be a folder called sites-available, which contains configuration files for websites, and a folder called sites-enabled, for those website configurations you actually run.
Change to sites-available using cd /etc/apache2/sites-available/ and create a new configuration there called myproject.conf: sudo nano myproject.conf. Note that I call this configuration file myproject.conf, because my fictional domain for this tutorial is http://www.myproject.be. In reality, I would give the file a name that lets me remember which domain this particular site configuration is connected to. You may serve multiple domains via the same apache web server. Each one would then get its own configuration file – so keep things understandable. For this tutorial I assume you have only one domain and apache is listening for HTTP requests on port 80.
Into myproject.conf, paste this content (explanation follows):
<VirtualHost *:80>
   DocumentRoot /var/www/html
   ErrorLog ${APACHE_LOG_DIR}/error.log
   CustomLog ${APACHE_LOG_DIR}/access.log combined

   #### Give Access to eXist:
   ProxyPass /exist http://localhost:8080/exist
   ProxyPassReverse /exist http://localhost:8080/exist

   ### Give Access to eXist's Package Service:
   ProxyPass /packageservice http://localhost:8080/exist/apps/packageservice
   ProxyPassReverse /packageservice http://localhost:8080/exist/apps/packageservice

   ProxyPassReverseCookieDomain localhost myproject.be
   ProxyPassReverseCookiePath /exist /

   ServerName localhost
   RewriteEngine       on
   RewriteRule         ^/(.*)$     /$1   [PT]
</VirtualHost>
The *:80 star in the first line is a wildcard for all domains, it means “for all incoming requests on port 80”. You only have to change the * to a specific domain such as myproject.be if you host multiple domains and want each of them to be served with a different web site. You would then create such a configuration file for each domain and replace the stars by the regarding domains.
A spot that you definitely want to adjust is the line that contains “myproject.be”. Replace it with your domain.
Save the configuration by pressing Control + o and confirm with Enter.
This configuration file tells Apache to pass all web requests (and responses) that come in via HTTP (on port 80) and that contain */exist/* to the regarding URL on our eXist-db server on localhost. E.g. http://www.myproject.be/exist/apps/myfirstapp/… would be internally passed (without the user seing it in her browser) to http://localhost:8080/exist/apps/myfirstapp/…
We call this (reverse-)proxying, because Apache is used as a proxy between the client (web user) and a locally-hidden server, here: eXist-db. Apache is the woman in the middle. It takes requests from the internet and passes them to the local eXist server. Then it receives responses from eXist and passes them back to the client.
By default Apache would directly serve folders and files from your servers filesystem to the client. It would not pass requests and responses to other, local servers such as eXist.
Therefore, to make this configuration work, you need to activate some additional Apache modules to enable the proxy functionalities. We will do this before we enable this configuration file. Type:
sudo a2enmod proxy_http proxy lbmethod_byrequests proxy_balancer rewrite
a2enmod is the command to enable apache2 modules. It is followed by a list module names. I’ll not give explanations for each individual module here, but instead refer to each module’s documentation page: proxy, proxy_http, lbmethod_byrequests, proxy_balancer, rewrite. You may use a2dismod followed by a module name, to disable it again.
Once all these modules are enabled, you want to restart Apache: systemctl restart apache: sudo systemctl restart apache2
Now you want to enable the site configuration we created earlier with: sudo a2ensite myproject and then reload apache2 with sudo systemctl reload apache2. Check if Apache’s default page configuration is enabled. It might conflict with our site configuration by giving another set of rules for *:80. Check the folder contents of /etc/apache2/sites-enabled. The default configuration is usally called 000-default.config. If it is in this folder, disable it with sudo a2dissite 000-default. Then reload Apache again.
Your eXist-db server should now be accessible via Apache2. Open a browser and enter http://www.myproject.be/exist. You should be forwarded to the dashboard.
5. Installing an eXist-db Application
After we installed eXist-db and configured Apache as a reverse proxy server that hides our local eXist-db server, we now want to install an eXist-db application and configure the Apache reverse-proxy to only forward us to this specific app but not to the dasboard.
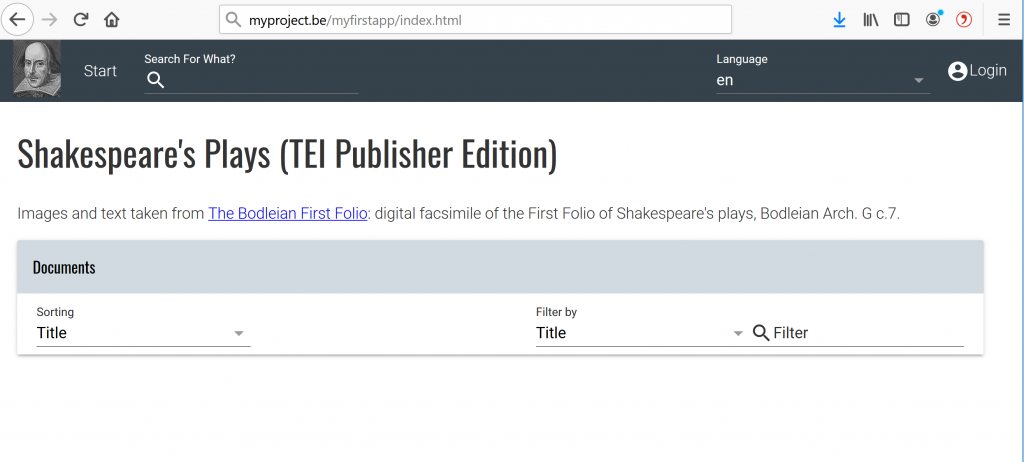
For the purpose of this tutorial we will install the ” Shakespeare’s Plays (TEI Publisher Edition)” sample app from the eXist-db app repository, but you may as well just install any other eXist application.
In other words: We want myproject.be/shakespeare to point to localhost:80/exist/apps/shakespeare – while myproject.be/exist shall only point to the Dashboard when we temporarily need to access it for configuration reasons.
Open your eXist Dasboard via the browser and login (top right corner) with the username “admin” and the password you set during the installation.
From the menu on the left select the “Package Manager”, then choose the “Available” tab. Here you can select whatever package you want (or drop a Xar Package to the Dropzone above) and install it by clicking the “Download and Install” button. For this tutorial install “Shakespeare’s Plays (TEI Publisher Edition)”. Downloading the package and installing it might take a while.
Once it is done, you will find the application under yourproject.be/exist/apps/shakespeare-pm. We now want to make it accessible via yourproject.be/myfirstapp
6. Reverse Proxying an installed eXist-DB Application
On your server’s secure shell navigate to /etc/apache2/site-available again and open myproject.conf with nano:
cd /etc/apache2/sites-available
sudo nano myproject.conf
Adjust the file to look like this:
DocumentRoot /var/www/html
ErrorLog ${APACHE_LOG_DIR}/error.log
CustomLog ${APACHE_LOG_DIR}/access.log combined
#### Give Access to eXist:
#ProxyPass /exist http://localhost:8080/exist
#ProxyPassReverse /exist http://localhost:8080/exist
### Give Access to eXist’s Package Service:
#ProxyPass /packageservice http://localhost:8080/exist/apps/packageservice
#ProxyPassReverse /packageservice http://localhost:8080/exist/apps/packageservice
### Give Access to Shakespeare App under /myfirstapp ProxyPass /myfirstapp http://localhost:8080/exist/apps/shakespeare-pm
ProxyPassReverse /myfirstapp http://localhost:8080/exist/apps/shakespeare-pm
ProxyPassReverseCookieDomain localhost myproject.be
ProxyPassReverseCookiePath /exist /
ServerName localhost
RewriteEngine on
RewriteRule ^/(.*)$ /$1 [PT]
Adjust the file just like you did before (change “myproject.be” to your own domain). Note how the lines that gave access to eXist’s dashboard and package service are now commented out. I only activate this access temporarily for as long as I do some configuration works.
Save the file with Control + o and Enter.
Reload Apache again: sudo systemctl reload apache2
You may now check out if the configuration works properly in the browser:
http://myproject.be should return whatever is stored in your Apache Document Root (usually under /var/www/html/).
http://myproject.be/exist should not point anywhere and return a “page not found” error
http://myproject.be/myfirstapp should return the Shakespeare app, that is running on your server under localhost:80/exist/apps/shakespeare-pm.
What’s Next?
You may install whatever other eXist-app you want and hide it behind a reverse proxy. You may as well run other local server software on the same Ubuntu system, such as a WordPress blog, a IIIF image server or whatever else you need, and add it to your Apache site configuration in the same manner.
Leave a Reply